|
|
 |
 |
|
Coating a fiberglass roof requires a little more care and elbow grease than the previous coating procedures we’ve talked about in this series. But the result will be the same: a renewed roof that puts an extra polish on your RV investment that will help enhance the use of your RV for years to come. As in previous reports, I want to emphasize two precautions that anyone coating an RV roof needs to take into account. The first is roof safety. Unless you are quite comfortable with standing or walking on it, we think the best way to work on an RV roof is using a scaffolding system from the side. Even the most agile of people must be careful if the roof is wet with water or chemicals. Doing a good job means first of all doing a good job of taking care of yourself. This takes a little more time at the beginning, but it also saves time and water as you get into the process and are faced with continually rinsing off the sides of your RVs to make sure all the dirt and contaminants in the roof rinse are not sticking to the sides. For the prep work, plan ahead to make any sealant repairs a week or two ahead of time. For the initial cleaning prep you’re going to want a specially formulated cleaner for fiberglass such as Dicor’s Fiberglass Clean & Prep. Apply it to your roof as directed and brush it in with a medium bristle brush in manageable 3’ X 3’ sections. It can be rinsed off with a simple garden hose. After finishing this first cleaning, let it dry and then take some fine or extra fine sandpaper and scuff up the surface lightly. This will create more surface area for the coating to stick to. Do this for the whole roof. You can use an electric sander if you like. Here I also need to make another big point about safety. In this scuffing process you are stirring up and detaching fiberglass splinters that can painfully embed themselves in your hand and even get into your eyes or be inhaled. Accordingly, if you do this, I recommend using three pieces of safety equipment: leather (not cotton) gloves; a quality painter’s mask; and eye goggles. Once you’ve scuffed the roof, blow or sweep off the splinters and any debris and do a second wash. You can make this a quicker affair with a mop if you like. Rinse with your garden hose.
Once finished, your new-looking roof will be ready for many more years to resist whatever the elements can throw at it! Rudy's Tip:
Use a leaf blower to speed up drying time for cleaning and coating. See roof coating video at dicorproducts.com |
You are receiving this email because you have asked to receieve industry related product and service announcements from Dicor Products. If you would no longer like to receive these emails you may unsubscribe at any time using the link below. |
 The second precaution is for your RV. I highly recommend masking off the sidewalls and front and rear caps of your RV from the roof with plastic sheeting and Frog Tape ® during cleaning and coating.
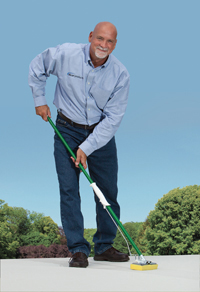 Once dry, put on the first coat of your fiberglass coating material with a medium nap roller, keeping the roller going in the same direction for the entire roof, whether it be side to side or front to back. Let it thoroughly dry and then apply the second coat, rolling the material in a consistent direction to crisscross the first coat at a 90 degree angle.